
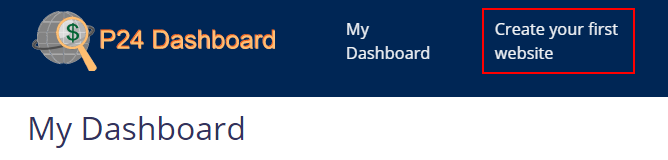
Getting Started With P24 Dashboard: Quick Start Guide
If you’re a content marketer, P24 Dashboard is a valuable tool for you. These are some of the things the app allows you to do:
- Plan and track each of your content/income websites
- Get an instant overview of all your sites’ content and performance
- Record and track promising search topics (keywords) for each site
- Build and maintain a target list of content (posts) you plan to create
- Manage and track the list of published posts and post updates
- Easily see post ranking and traffic performance in each site
- Dig into the detailed performance for each post
- Set up alerts to instantly catch important changes in traffic or rankings
- Schedule auto-importing your posts from WordPress sites
- Instantly find new content opportunities through top queries for a post
- Record and track each website earnings and revenue per traffic (RPM)
Table of Contents
1. Create a website
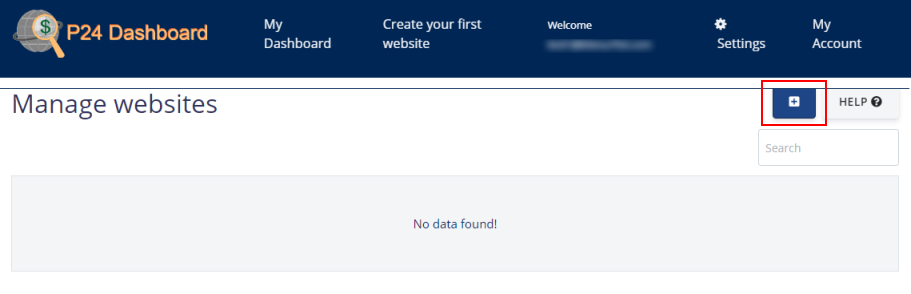
When you sign up for P24 Dashboard and log in for the first time, the first thing you need to do is create your websites.
In the “Manage Websites” settings view, click on the “+” sign to create your first website:
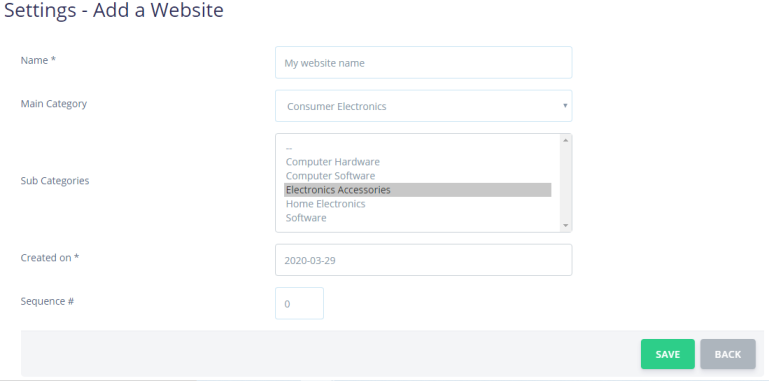
Fill out the basic info for your website, including a name and a creation date (e.g. today). You can optionally select a category and/or a subcategory for your site – this will be useful later for some features. Then hit the Save button.
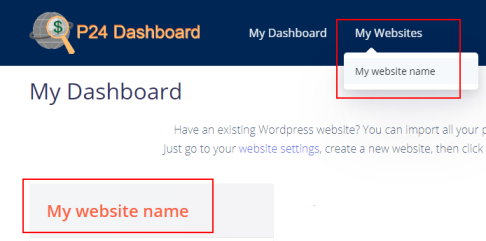
At this point, you have your first website created, and you can see it listed in Settings -> Manage Websites:

Now that you’ve created your first website, the next step depends on how you want to use the Dashboard. P24 Dashboard has two main features areas:
- keyword and post planning, which we call Topic Research
- and performance tracking, which we call Traffic Analysis
You can choose to use the Dashboard for either of these two areas or for both. Users typically use the Dashboard for one or more of the following:
- Manually plan keywords and content posts for a website
- Import existing keywords and/or posts and start planning from here
- Only check out key traffic stats for an existing WP site (no keyword/post planning)
- Import all the keywords and posts from an existing WP site and work from there
Let’s look at how to get started for each of the above use cases.
2. Manually plan keywords and posts
If you’re starting from scratch and building a brand new content/niche website, you can start recording the keywords you harvest through your keyword research (aka Topic Research). Start by selecting your website from either the My Dashboard view or from the top navigation menu “My Websites”:
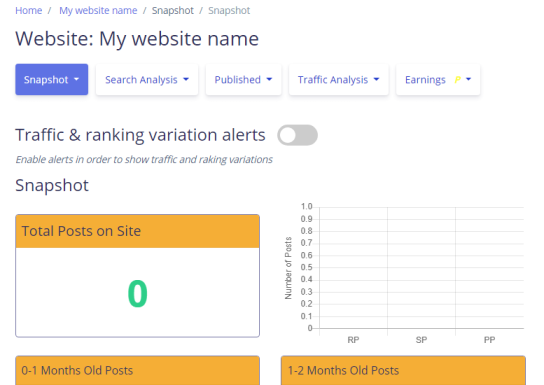
You’ll reach the main Snapshot view for your selected website:
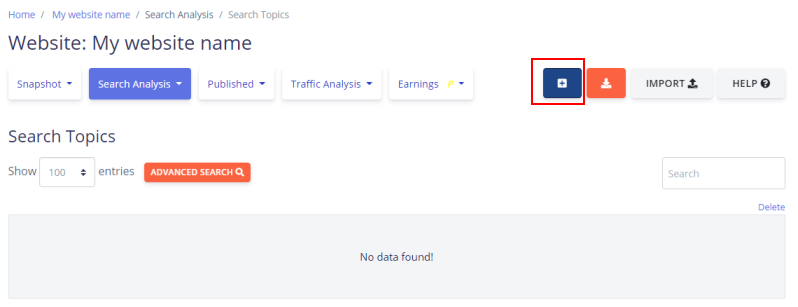
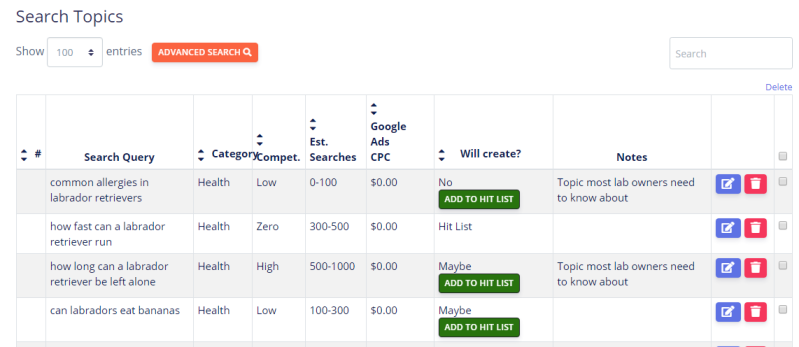
From the “Topic Research” top menu, select the “Search Topics” submenu, then hit the “+” icon to create a new topic:
Fill out the “Add a Search Topic” form by entering your search query (the keyword), category, and optional keyword data such as competition (low or high etc), volume estimate (e.g. from a keyword tool), description, and whether or not you will create this post on this topic – you may choose to dismiss the topic because of excessive competition or insufficient volume, for example.
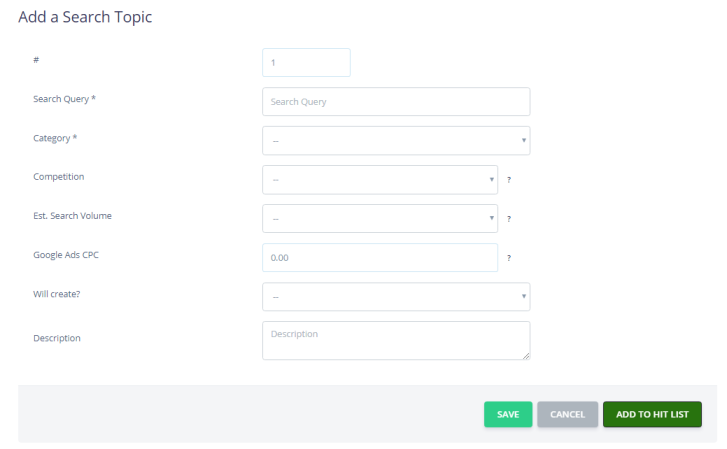
Note that you can manage your categories through the “Topic Research” -> “Categories” submenu.
Before you hit Save, you can optional choose to immediately add the topic to your list of planned posts – by clicking the “Add to Planned Posts” button. In the “Add To Planned Posts” form, you specify the SEO Title and the type of post you’ll be creating.
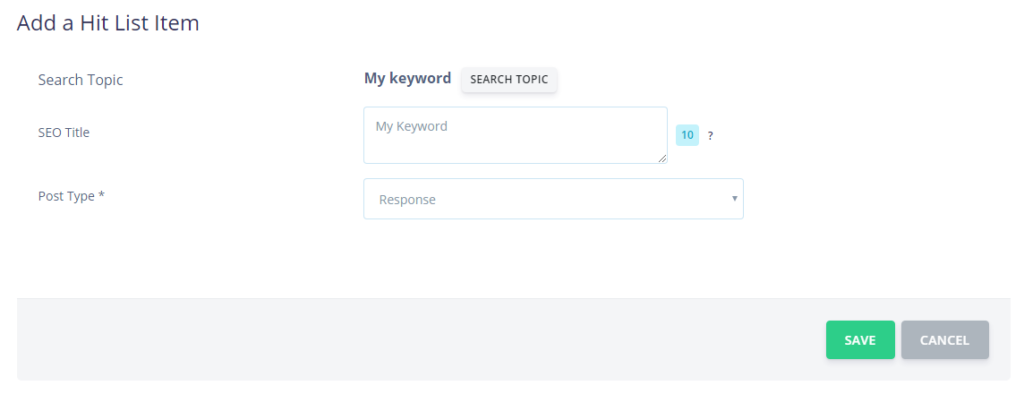
The SEO Title is your actual post title. It typically includes your keyword (topic) but may also contain additional words to make the title more attractive in the SERPs. The post type is related to the chosen length and depth level of your post (e.g. shorter, standard, longer, or epic).
3. Import existing keywords and/or posts
Instead of starting your website content planning by manually entering keywords into your Search Topics list, you can start by importing an existing keyword/post list you already have. You can use the CSV import to import keywords. In your Search Topics list, click the Import button:

In the popup, click on the “CSV template” link to download a blank CSV file:

Then copy and paste your keyword list into the blank CSV file, making sure your fill out the required columns (marked with *). Once you’re done, simply click Choose File in the popup form and select the CSV file you filled out on your PC, then hit Import. Once the import completes, you should see your keyword list listed in the Search Topics view.
Alternatively, if you have a list of published posts, instead of importing your keywords you can directly import your post list into your Published Posts view. Similar to Search Topics, in the Published Posts view click the Import button, download the blank CSV template, and paste your post list into it, filling out the required columns. Then select the CSV file from on your PC and hit Import.
Note that importing your list of posts into Published Posts will automatically create associated Search Topics, inferred from your post titles, and planned post records – a topic needs to be added to your Planned Posts before a post can be published. The import program does it automatically.
4. Simply explore traffic data for an existing WP site
If you’re not interested in the keyword and post planning (Topic Research) side of P24 Dashboard, and all you want is to monitor your existing content websites performance, this section is for you.
Assuming you’ve already created a website as explained in Section 1 above, your next step is to grant P24 Dashboard read access to your Google Analytics (GA) and Google Search Console (GSC) so it can fetch key data and load them into the Traffic Analysis view.
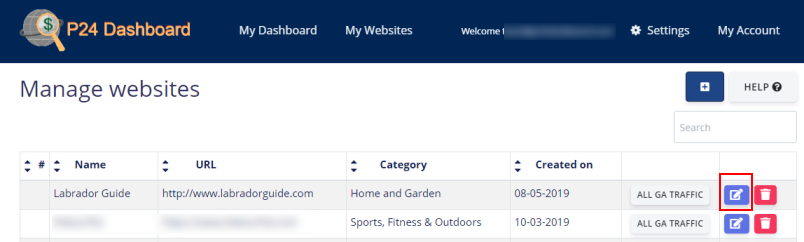
That’s actually quite easy to do: go to Settings -> Manage Website and click the edit button for your website:
In the website settings page, scroll down to the authorization section:

Fill out your website’s URL as specified in your GSC account, and your GA View ID – click on the “What’s this” link to the right of the field for more on where to find the View ID in your GA account. Then click the Authorize button and follow the simple Google auth process. Again, the “What’s this” help page will guide you if you’re not sure.
Note that you only need to authorize your website once, after that P24 Dashboard will automatically fetch the data whenever you need to see it.
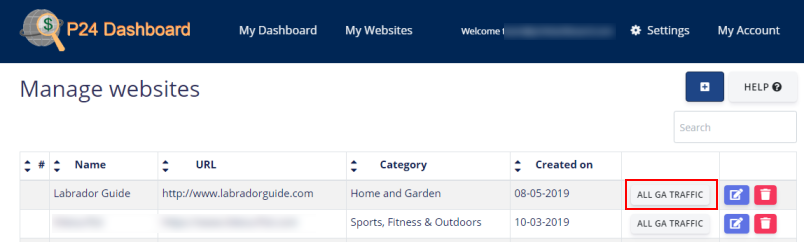
Once you’ve properly authorized your website, go back to Settings -> Manage Websites and click the “All GA Traffic” button:
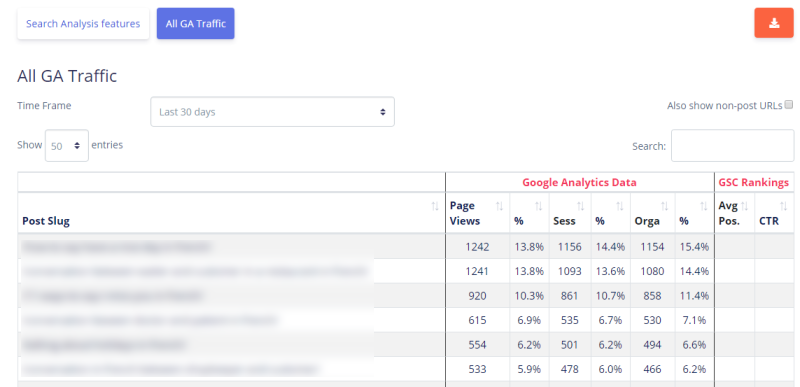
You’ll see all your posts listed in GA along with key traffic and ranking data for those posts. This “raw” traffic analysis view is similar to the Traffic Analysis view found inside the website area (Websites -> My website -> Traffic Analysis) except the latter view also includes essential keyword and post metadata such as post maturity, category, wordcount, post type, etc.
The difference between the “raw” and the “full” Traffic Analysis views is that the latter first requires creating your Published Posts list, which in turn requires creating your Search Topics list and your Planned Posts. This can be done very easily, however, by simply importing your WP website as detailed in the previous section.
5. Import the post data from an existing WordPress site
Importing lists of keywords or posts (as in section 3) is a somewhat manual process and can be tedious due to data inconsistencies, missing values etc. For this reason, we’ve added a much easier way for WordPress content site owners to import their post and topic list into P24 Dashboard.
Go to Settings -> Manage Websites and select the website you want to import data into:
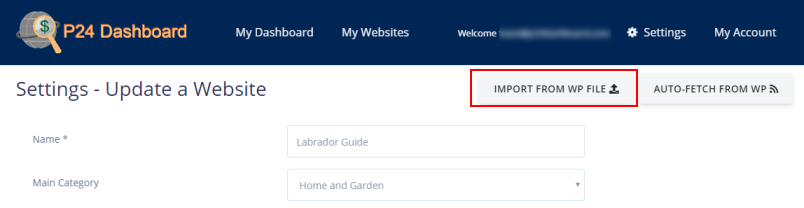
The “Import From WP File” lets you select a WP export file on your PC and import all your posts into the Dashboard, also creating the associated Search Topics and Planned Post records on the fly.
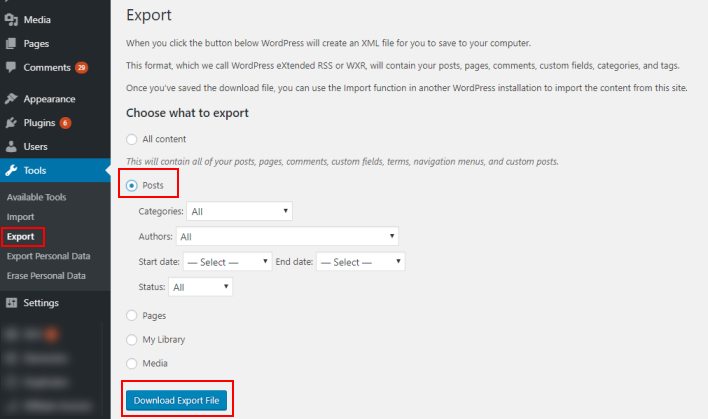
You’ll first need to go into your WordPress admin, select Tools -> Export, select the Posts radio button, and hit the download button:
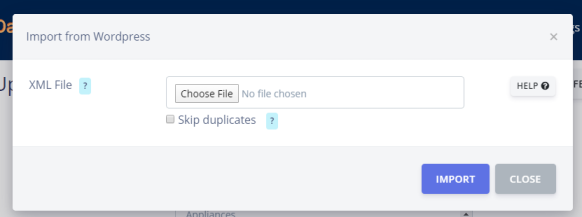
Then in the “Import From WordPress” popup form, click Choose File and select the WP export file you just downloaded on your PC. Make sure the “Skip duplicated” option is checked to avoid importing posts that are already in your Published Posts list.
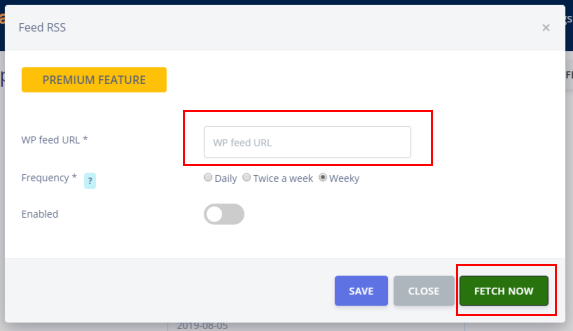
Another, more advanced option for importing posts and topics into the Dashboard from a WordPress site is using the “Auto-Fetch From WP” button (premium feature):
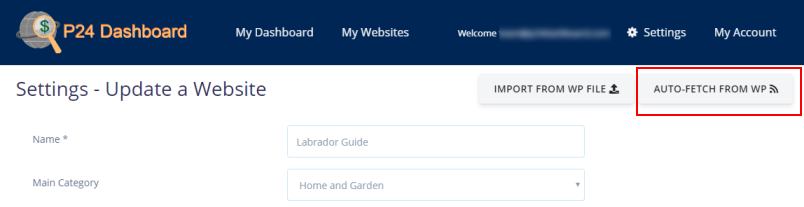
This option automatically imports all your posts from your WordPress feed, a public XML document which contains your post list and data. By default, WordPress makes your feed available at yourdomain.com/rss. Simply enter your RSS URL and hit “Fetch Now”:
You’ll see the list of imported posts (and any skipped posts to avoid duplicates), and you’ll see the new records in your Published Posts, Planned Posts, and Search Topics.
The RSS import also allows automatically fetching new posts form your RSS feed at a regular time interval: simply flip the “Enabled” toggle to on, select a fetch frequency, and save. The Dashboard will automatically import your newer posts at the specified time interval.